5 string fretless bass project

Section 4: The Body

Design | Neck | Fingerboard | Body | Finishing | Suppliers


Click to enlarge

Here you can see the unglued neck/fingerboard combo with the two pieces of wenge laid alongside it - the sides of the wenge were nice and flat so I left them be. The design for the body shape was cut out from a piece of tracing paper and then white-penned (ie tippex-pen - nice and easy to see!) the design onto the wenge...


Click to enlarge

Here are the marked out pieces of wenge.


Click to enlarge

Sometimes a design that looks good on paper can look wrong when 'in the flesh'. Here I decided to make the top horn of the bass a bit fatter in order to allow more curvature without stressing the wood.

Then it was off to the mechanical workshop again... I was hoping to use the bandsaw, but unfortunately it was out of action (drivebelt had shredded itself!), and so the only tool I could get my hands on was a fairly beefy jigsaw. The blade got very hot indeed cutting the wenge (it is really tough wood!) and so you can see a few burn marks on the sides of the wood - not to worry as they'll sand off easily enough.


Click to enlarge

Here you can see a good view of the enormous error I made in the basses design. I had cut the neck to a nice smooth profile, but didn't consider the heel joint closely enough in 3-dimensions. Although the top and bottom bits of the wenge at the joint will be blended in, I knew at this point that I should have left more wood on the neck to help the blending-in...


Click to enlarge

...It doesn't look too bad from the front though...!


Click to enlarge

Here's a profile shot of the problem. You can see how much wood is missing..! The solution was to get the piece I'd cut off (which I'd luckily saved), and glue it back on during the fingerboard bonding process. Fortunately, it worked!!


Click to enlarge

Here you can see the neck/fingerboard combo (now glued) and the two pieces of wenge (roughly sanded to remove the jigsaw marks) as yet unglued being checked for alighment... It looks pretty good.


Click to enlarge

After liberal slapping-on of epoxy resin mixture, and buying a couple of cheap sash-clamps, here is the two body pieces being glued onto the through-neck. It's important to keep a good consistent pressure on the wood being glued, but ensure that it doesn't slip or mis-align during the process. It was left for 24-hours to cure itself.


Click to enlarge

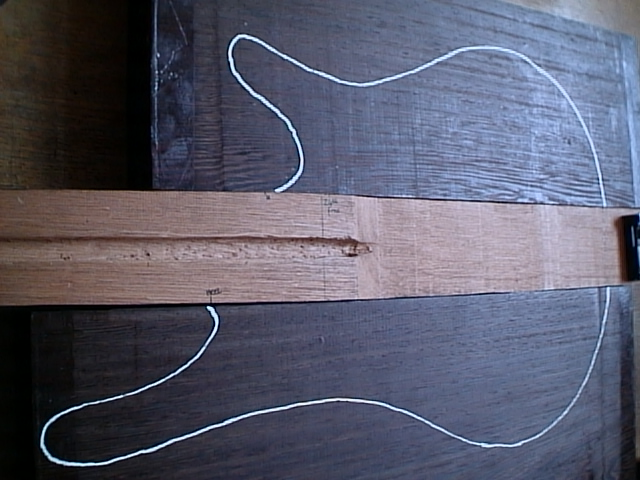
Here's the bass (yes, it actually looks like one now!!) after removing the sash clamps. The joint came out perfectly, and very, very strong!! The glue manufacturers claim that the glue is far stronger than the wood you glue with it - and I don't doubt it for a minute.

There is a dilemma in the guitar-making community regarding glues. You can glue things like the fingerboard on with standard aliphatic wood glues, which 'pull' the wood together as they dry. If there is a problem, it is possible to separate the joint with a bit of effort, fix the problem then re-glue. Epoxy is far stronger, and it would not be possible to separate the wood should a problem arise. However, someone wise once said - get it right the first time, and you won't need to separate the joint...


Home | About Lee | Links | Back | Continue